What Is the R4-2 Pass With Care Sign?
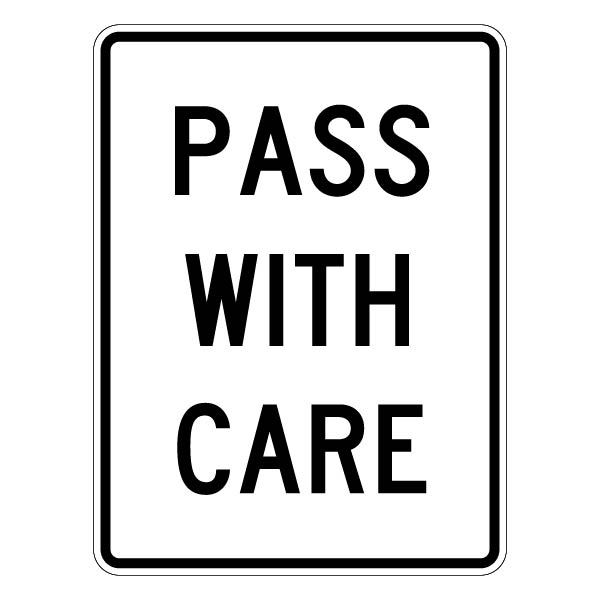
Pull up a mental image of a quiet two-lane country road somewhere in rural America. There's a solid yellow center line, a gradual curve ahead, and just past where the line transitions back to dashes — a small white rectangular sign on the right shoulder reading three words: PASS WITH CARE.
That's the R4-2. It's a federal Regulatory Signs, defined and standardized in the Manual on Uniform Traffic Control Devices (MUTCD) under Chapter 2B, Section 2B.37. Despite its modest appearance, it carries real legal weight. Regulatory signs aren't suggestions — they exist within the framework of state traffic law, and the R4-2 is no exception.
The sign has been part of the MUTCD for decades. It didn't change dramatically in the 11th edition (2023), which is itself a statement — the design has proven clear and effective enough to survive multiple overhaul cycles. But understanding exactly what it tells you, and the engineering logic behind where it goes, is more interesting than most drivers realize.
What Does It Actually Mean for Drivers?
Here's the thing that trips people up: the R4-2 is not simply saying "you can pass now, go for it." It's more nuanced than that, and that nuance is baked right into the word choice — care.
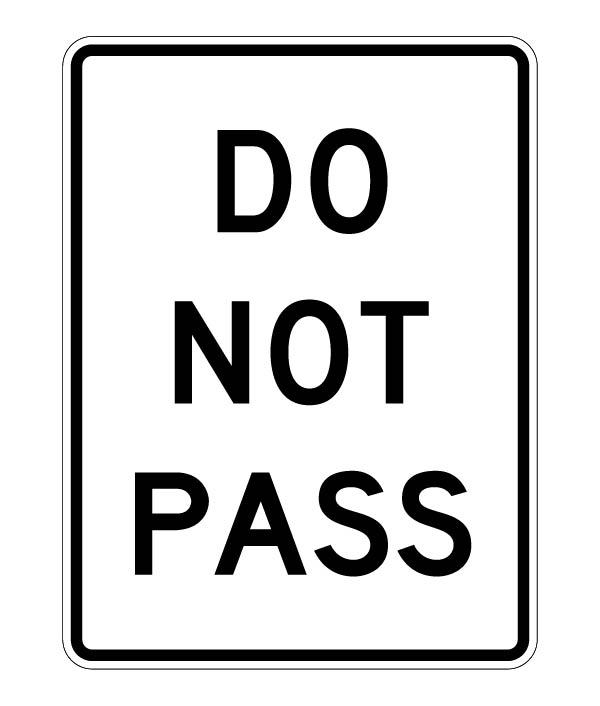
When you see a Pass With Care sign, it means the legal restriction on passing that existed in the previous stretch of road — enforced by the solid yellow center line and/or the R4-1 Do Not Pass Sign — has ended. You are now legally permitted to overtake slower vehicles. But the sign is simultaneously reminding you that the road conditions immediately ahead still warrant heightened caution when you do so.
"Passing is now permitted — but the burden of safety is squarely on you. The sign changes the maneuver from prohibited to high-risk-and-allowed."— Engineer Fix, MUTCD Sign Analysis, 2026
Think about why these signs appear where they do. You might emerge from a no-passing zone caused by a blind hill, and immediately after the crest, sight lines open up — but there could be an intersection 400 feet ahead, a farm driveway, or pedestrians on a path that crosses the road. The PASS WITH CARE sign acknowledges that you technically have enough visible road to attempt a pass, but the environment around you still demands active risk assessment before you pull out.
This is different from a road where there's simply no restriction at all. The R4-2's presence is a deliberate engineering signal. Someone sat down, studied this specific location, and decided the transition zone between "no passing" and "free passing" needed a reminder.
The R4-1 / R4-2 Pair — How They Work Together
You almost never see an R4-2 without an R4-1 having appeared earlier. The MUTCD is explicit about this relationship. Section 2B.37 states that the Pass With Care sign should be installed at the downstream end of a no-passing zone if a Do Not Pass sign was installed at the upstream end. They function as a matched set, bookending a restricted zone.
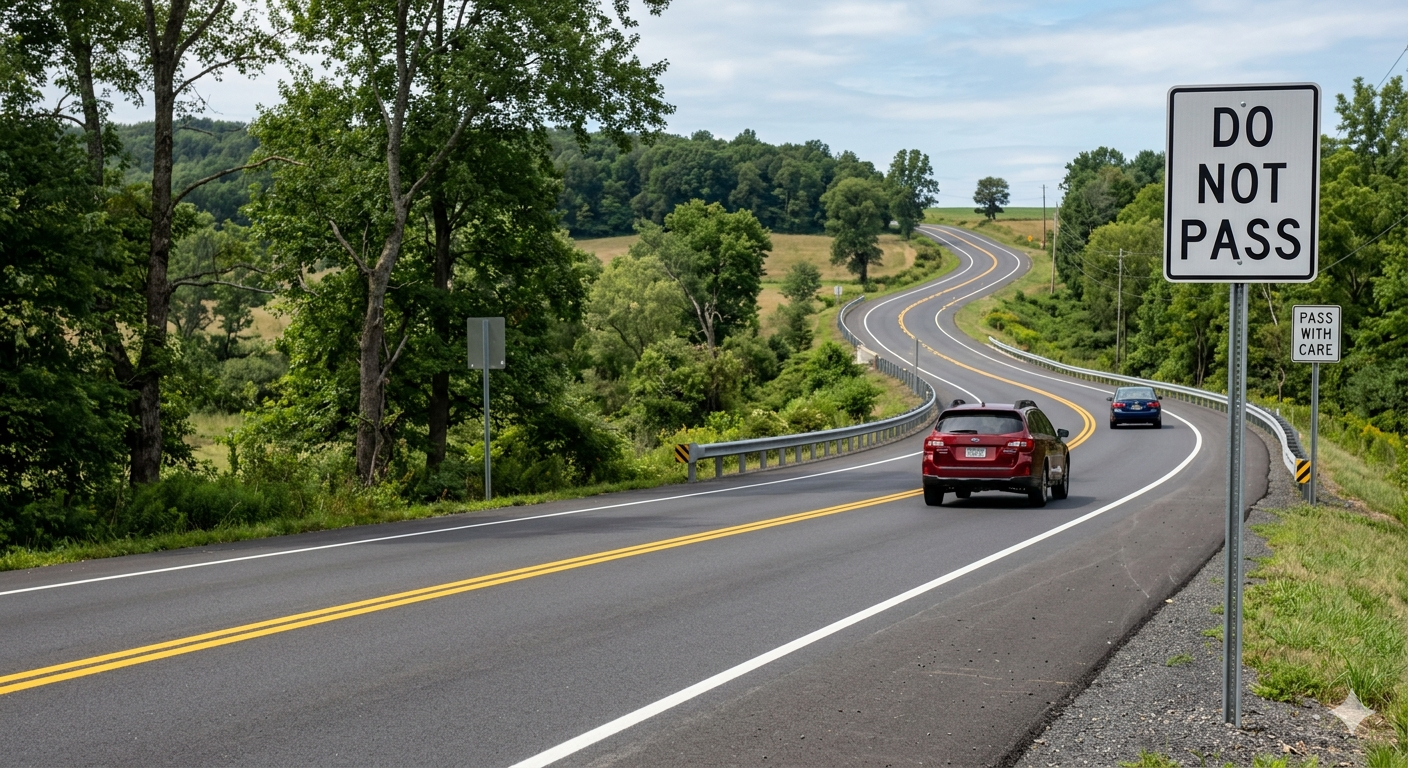
Here's a practical example of how this plays out on a real road. Imagine you're driving north on a two-lane state highway through farmland. You crest a hill and immediately lose sight of the road ahead — traffic engineers determined the available sight distance is below the minimum required for safe passing at the posted speed. So they installed an R4-1 on the right at the top of the hill, along with a solid yellow center line.
Half a mile later, the road straightens out and sight lines fully open. Engineers end the solid line, restore the dashed center line, and put an R4-2 on the right shoulder. The system is complete: entry point marked, exit point marked, zone clearly communicated to all road users.
NOT
PASS
PASSING
ZONE
It's also worth noting that in some temporary traffic control zones — construction work zones, for instance — signs replace pavement markings entirely. In those situations, the MUTCD specifically allows the R4-1, R4-2, and W14-3 (No Passing Zone warning sign) to be used as substitutes for the painted center line markings, particularly for short-duration setups of 14 days or less.
Appearance, Shape & Color
The R4-2 is one of the cleaner, more legible signs in the whole MUTCD library. No symbols, no pictograms — just three words on a white field. Here's what the standard specifies:
One interesting wrinkle: California and a handful of other states historically used a yellow background instead of white for the R4-2, while keeping the black text. Nationally, white is the MUTCD standard. The yellow variant creates a subtle visual distinction from purely white regulatory signs — some states preferred it because it echoed the yellow warning sign family, reinforcing the "proceed with extra caution" message.
The font is FHWA Series D — the same Highway Gothic typeface you see on speed limit signs and most standard road signs across America. The 11th edition confirms that Clearview is no longer approved for new installations on regulatory signs, so if you're fabricating R4-2s today, Series D is what you use.
Where Engineers Place It
Placement of the R4-2 follows the logic of sight distance engineering. The sign goes at the point where the conditions that necessitated the no-passing restriction no longer apply — in other words, where a competent driver with good visibility and adequate speed judgment could reasonably attempt a pass without encountering the hazard that triggered the restriction in the first place.
Practically, here are the most common contexts where you'll find an R4-2:
-
End of a blind curve or hill: The most classic placement — the no-passing zone existed because you couldn't see far enough ahead. Once the road straightens or the hill crests, the R4-2 appears.
-
Exit from a narrow bridge approach: One-lane bridges or reduced-width sections often carry a no-passing restriction. The R4-2 goes where the road widens back to standard.
-
Construction zone boundary: In work zones, the R4-2 (along with the R4-1 and W14-3) can substitute for painted markings to define the passing restriction area.
-
After a restricted intersection approach: Some locations restrict passing in the approach to a complex intersection; the R4-2 marks where that concern area ends.
-
Areas with limited shoulder or vulnerable users: Where cyclists, farm equipment, or pedestrians regularly share the corridor, the R4-2 signals you're returning to a zone where passing is your call — but the environment is complex.
The MUTCD also specifies that the R4-2 must be the same size as the R4-1 it pairs with, and must be erected in the same manner — same post type, same mounting height. This consistency helps drivers unconsciously recognize the symmetry: what was placed at the start of a zone is mirrored at the end.
MUTCD Specifications (Size & Retroreflectivity)
Under the 11th edition, the R4-2 falls under the general retroreflectivity requirements for regulatory signs. Here's how it stacks up against its closest relatives in the R4 family:
| Sign Code | Sign Name | Standard Sizes | Min. Retroreflectivity (RA) | 11th Ed. Status |
|---|---|---|---|---|
| R4-1 | Do Not Pass | 18″×24″ / 24″×30″ / 36″×48″ | 7.0 cd/lux/m² (white) | No Change |
| R4-2 | Pass With Care | 18″×24″ / 24″×30″ / 36″×48″ | 7.0 cd/lux/m² (white) | No Change |
| R4-3 | Slower Traffic Keep Right | 24″×30″ / 36″×48″ | 7.0 cd/lux/m² (white) | No Change |
| R4-7 | Keep Right | 18″×24″ / 24″×30″ | 7.0 cd/lux/m² (white) | No Change |
| W14-3 | No Passing Zone (companion warning) | 30″×30″ / 36″×36″ | 50 cd/lux/m² (yellow) | Updated |
State-Level Differences & Exceptions
While the MUTCD sets the federal standard, states have some latitude in how they implement passing zone signage — particularly regarding when these signs are required versus optional.
- R4-1 and R4-2 are not mandatory at every no-passing zone — pavement markings alone can define the zone
- Signs are typically added when markings alone are insufficient for emphasis
- Some states require signs only on roads with posted speeds above a threshold
- Work zones of 14 days or less where painting is impractical
- One-lane bridges and restricted-width structures
- Locations where engineering judgment identifies high violation rates
The most notable state-level difference is California's yellow background variant. Rather than the white-on-white regulatory look, California historically used yellow for the R4-2, making it visually distinct and arguably more salient at the end of a no-passing zone. Other states like Oregon and Washington have at times used supplemental text below PASS WITH CARE in specific contexts.
State laws also create some interesting passing exceptions that interact with these signs. In Colorado and Minnesota, for example, you're permitted to overtake a bicyclist in a no-passing zone if you can do so safely with adequate clearance — and once you've seen the R4-2, those same states still expect you to apply good judgment about the specific road users ahead of you.
Common Questions Answered
Is the R4-2 a legal requirement or just a suggestion?
It's a regulatory sign, which means it carries legal authority — but the "suggestion" framing is understandable because it doesn't prohibit anything. What it does is formally end a passing restriction while placing the full responsibility for a safe pass onto the driver. If you pass in a way that causes a collision after an R4-2, you can't claim ignorance of conditions — the sign told you to use your judgment carefully.
Can you pass immediately after seeing an R4-2?
Legally, yes — the restriction has ended. Practically, you need to look at the actual road ahead of you. The R4-2 ends a legal zone, not a physical hazard. If there's a blind driveway 100 feet ahead or a slow-moving tractor just coming over a rise, the sign's removal of the restriction doesn't create a safe passing opportunity.
What's the difference between R4-2 and the No Passing Zone sign (W14-3)?
The W14-3 is a warning sign — diamond-shaped (or pennant-shaped in some older installations), yellow background — and it appears on the left side of the road at the beginning of a no-passing zone. The R4-2 is a regulatory sign — rectangular, white — on the right side at the end of the zone. They're complementary parts of a complete system, not redundant versions of the same message.
What if there's no R4-2 at the end of a no-passing zone?
The pavement markings are the primary control device. If the solid yellow center line transitions back to a dashed line, the no-passing zone has ended regardless of whether a sign is present. The R4-2 is supplemental signage that reinforces what the pavement is already telling you. Its absence doesn't create ambiguity if the markings are clear.